Naturalis v1.2: Clothing Adjustment Profiles
Clothing adjustment profiles enable Naturalis to produce changes in shape and physical behavior depending on what clothing is currently equipped.
Adjustments
Forces, Hold & Dampening
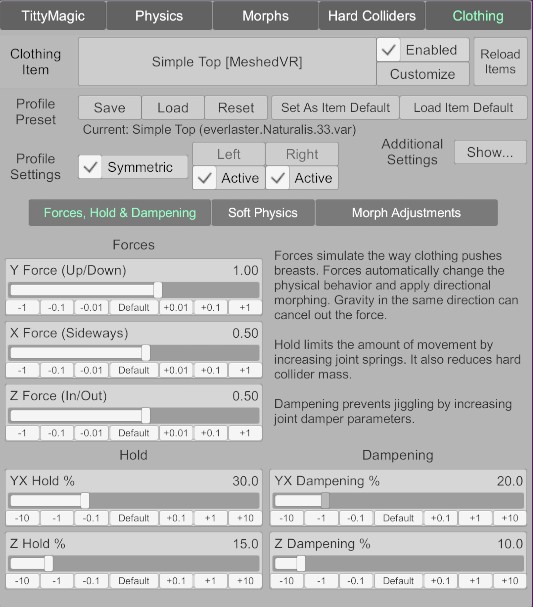
Forces simulate the way clothing pushes breasts/glutes. They automatically change the physical behavior and apply directional morphing, just like gravity would if rotating the person’s pose.
“Hold” increases joint springs, making the breast or glute stay in place more rigidly. “Dampening” adjusts the joint dampers. These are split for YX and Z, i.e. up/down/left/right is one slider, in/out is another. The percentage means how much the physics parameters are increased from their calibrated value towards the maximum value of that parameter.
Soft Physics On Covered Areas
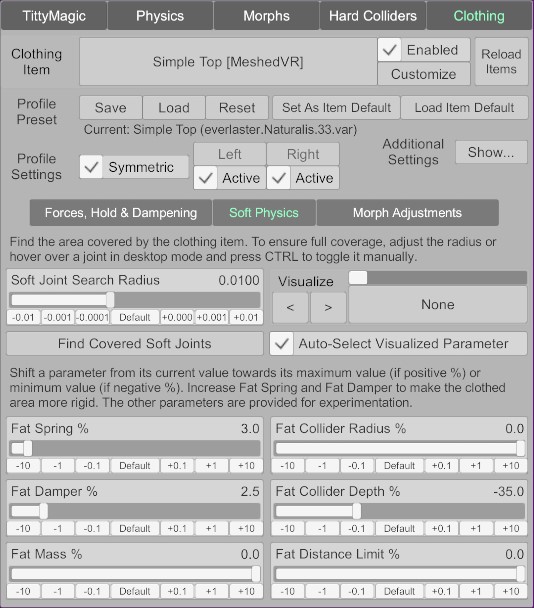
You can make soft physics behave differently on the area covered by a clothing item. Since each item is different, the plugin needs to find which soft joints are covered by the item - this is easy to do:
- click on Find Covered Soft Joints, and the plugin will try to automatically determine the area
- hover with the mouse (desktop mode only) over any of the visualized soft joints, and toggle its selection on/off by pressing Ctrl
Adjusting the physics: for example, increasing Fat Spring % affects all of the selected clothing coverage joints, making them more rigid.
Morph Adjustments
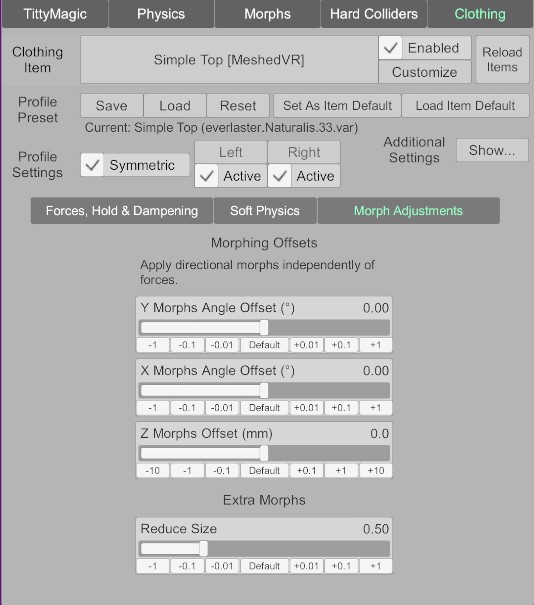
The morph offsets allow you to shift the angle that is used for calculating morph values when the joint rotates left/right, up/down or moves in the in/out direction. This produces morphing without actually rotating or moving the joint. The idea is to primarily use the forces. to physically move the breasts, and then fine tune the shape with the morph offsets. See also morph transition timer.
The Reduce Size slider can be used to better match the clothed breast size to the naked breast size. It’s intended to be used with clothing that fully covers the breasts.Toggle the item on and off to easily check if the breast size looks the same clothed and uncovered.
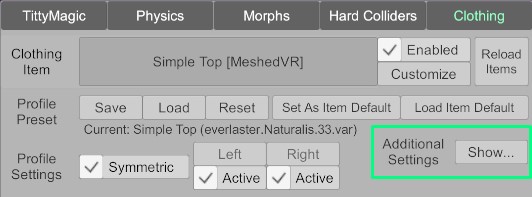
Additional Settings

Target Profile Transition
The Target Profile Transition feature allows you to select a target profile or set the profile off state (essentially all sliders at zero) as the target, and then transition from the current profile to the target values using the Profile Transition % slider. The transition slider is a triggerable parameter specific to each clothing item/profile, and the selected target profile path as well as the percentage save with the profile preset file.
In simple terms: the “From” profile is the current profile, and the “To” profile is the target profile. At slider value 0, all of the adjustments are at the current profile’s values. At slider value 100, all of the adjustments are at the target profiles values.
Morph Transition Timer
Enabling/disabling the profile or the clothing item itself transitions the morphs smoothly along the Morph Transition timer. This slider only has an effect when the offsets in the Morph Adjustments tab are in use. The point of this is to ensure that the morph transition isn’t instant and unrealistic.
Set Profile Off When Undressing
Deactivates the profile when Undress is toggled on in the item’s physics settings (if sim item).
Profile Management
All of the adjustments to shape and physics are stored in the profile file rather than in the plugin’s own data, i.e. they do not save with the scene. But the currently selected profile, if saved to file, will be referenced in the plugin data and be auto-applied when the scene is loaded. This means you must save the profile in order to not lose your changes!
Profile Locations
Profiles are saved to the following folders:
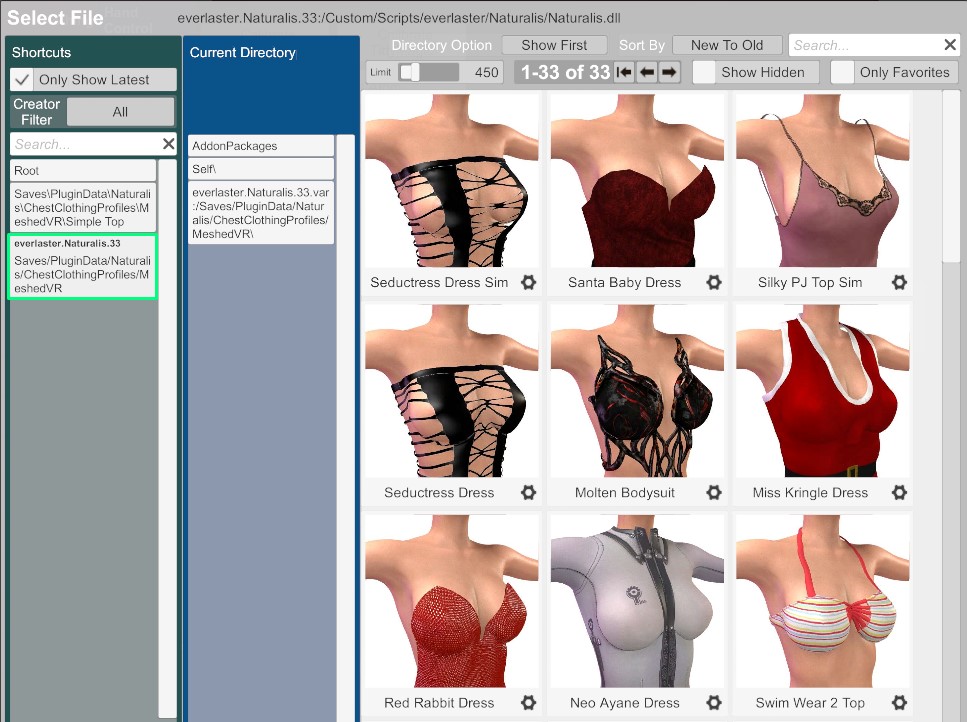
BootyMagic: VaM/Saves/PluginData/Naturalis/HipClothingProfiles/<Author>/<Item>
TittyMagic: VaM/Saves/PluginData/Naturalis/ChestClothingProfiles/<Author>/<Item>
Default Profile Loading Priority
The plugin will automatically apply the default profile for an item when the item is first enabled. The default profile can exist in a few different locations:
- Default.json in the local folder (see locations above) takes first priority
- If the above local default profile doesn’t exist a. and the item is a built-in item, the plugin will load the built-in item’s profile from the current Naturalis var package b. and the item is a custom var packaged item, the plugin will look for a default profile in the item’s var package
Misc. Info
Asymmetric Clothing Support
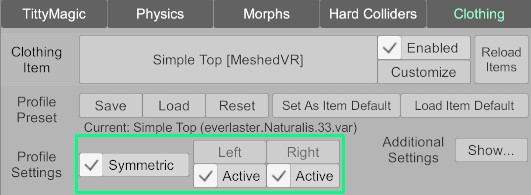
If you toggle off the Symmetric checkbox, the Left and Right buttons become clickable and allow you to switch between the left and right side adjustments. All of the current adjustment values get copied to both sides when you first uncheck Symmetric in the profile, and from there on the adjustments are fully independent for each side.
Multiple Clothing Layers Support
Multiple items will also each apply their own soft physics adjustments which get combined on any overlapping areas. For example, a bra applying Fat Spring 50% and a shirt applying Fat Spring 10% will mean the area covered by both the bra and the shirt will get the 50% value, while the area covered only by the shirt will get the 10% value. The percentages mean essentially how much the parameter’s value is increased from the naked value towards the parameter’s maximum value.
Triggerable Parameters

All of the adjustments are supported in VAM’s triggers system, allowing e.g. other plugins like Timeline to set or animate the values. The parameters are available per item, and are registered for the current plugin session when the item is first enabled in the current plugin session.
In addition, you can trigger the loading of a profile from a specified path, as well as animate the transition to the target profile.
Identified Items And Tagging
TittyMagic and BootyMagic identify clothing items based on the Region Tags in the clothing item’s user prefs:
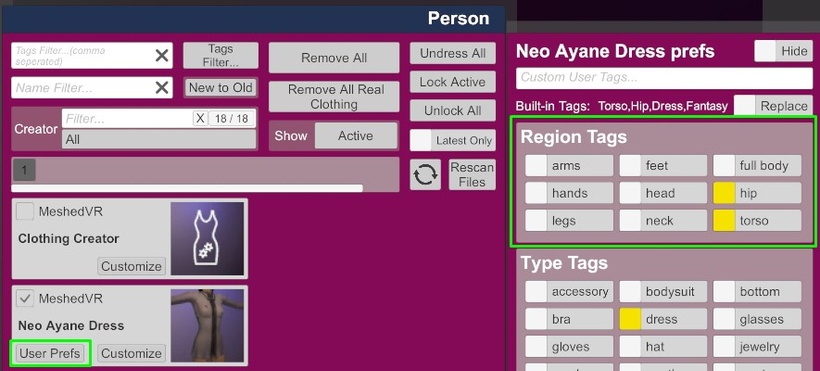
The rules are simple.
- If there are no region tags (built in or set by user), the item will show up in both plugins.
- If “full body”, “hip” or “legs” is checked, the item always shows up in BootyMagic. If none of these is checked, but any other region is checked, the item will not show up in BootyMagic.
- If “full body” or “torso” is checked, the item always shows up in TittyMagic. If neither of these is checked, but any other region is checked, the item will not show up in TittyMagic.
As an example, the Neo Ayane Dress has built in tags for hip and torso so it shows up in both plugins.
Another example: some headwear item like sunglasses that is correctly tagged “head”, and doesn’t have any of the “full body”, “hip” or “torso” tags, will not show up in either plugin.
You can easily use this to ensure that the right items are showing up. Anything that’s missing - just give it the “full body”, “hip” or “torso” tag. Anything that’s showing up incorrectly because it’s missing a region tag, just give it the correct tag.
Using Built-In Profiles As Templates
Built-in clothing items have default profiles included in the plugin var:
These profiles are always available to be loaded on any item, allowing you to use e.g. the adjustment profile for Alphakini Bra as a starting point for a custom bra. However, the covered soft physics area is not applied from the profile in this case, you’ll need to map the coverage for the custom item separately.